This is not a cooking blog.
But! I do love to cook, and I love to take photos and I definitely consider the food world art. So, it all fits, right?
One of my very most favorite things in the world is crystallized ginger. I love the texture of the sugar crystals scratching my tongue, the chewy-gummy-but-sometimes-crisp texture and that delicious, delicious heat. It’s like eating a hot pepper, except… good.
I use it in the frosting on my carrot cakes, in truffles for gifts and sometimes in granola. But, I rarely have it on hand, because it is so expensive to buy.
Then I thought, “Why is it so expensive? It’s just sugar and ginger!” You can’t even justify any kind of labor costs with this stuff. It takes about two hours start to finish – more if you soak your ginger longer. And for most of that time, you aren’t even doing anything!
I took pictures the last time I made a batch, so you could see how it’s done:
Step 1: Slice your ginger into thin pieces – 1/8″ or less is my preference, and I always use my cheap little mandolin to do it, because cutting all that with a knife takes forever. Special Hint: Hit up your local Asian market for your ginger. You can get 2-3 pounds of ginger for the cost of one big knot at the grocery store.
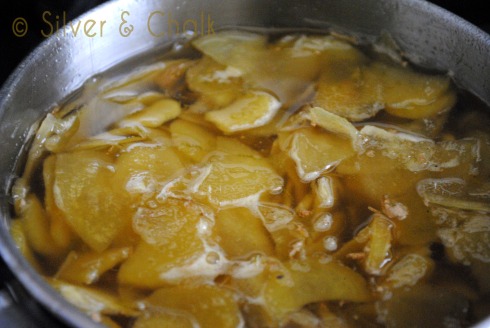
Step 2: All your ginger slices are going to go in a small saucepan with a simple syrup. The simple syrup is super… simple. Use a 1:1 ratio of sugar to water, dissolve it over medium-high heat. Let it come to a slight simmer before you put the ginger in, and then keep it at the barely simmering point for the rest of the time. If you want to add a little vanilla or lime zest, this is a good time to do so. You can mostly just leave this alone, uncovered – just peep at it every now and then and give it a good stir to distribute the ginger. Most recipes say you only have to simmer for 20 minutes – and that’s fine – but the longer you simmer, the more delicious it will be. I usually go for 2 hours or so. When you are ready, take it off the heat and let everything cool down before you mess with it.
Step 3: The next step is to dry out the slices. You’ll need at least one decent sized cooking rack. Don’t even think about trying to dry these things on foil or parchment – they will stick and you will have a total ginger disaster. Strain the mixture over a bowl – do not let all that gorgeous ginger-infused syrup go to waste! Then just pluck out the pieces of ginger and lay them on your rack. I usually let mine dry for a few hours, and sometimes even overnight. You’ll know they are ready when they are just slightly sticky and bendy.
Step 4: Once everything is dry, toss the ginger with some sugar. I usually just dump some sugar in the bowl, and toss everything around until well coated. Then I leave it in the bowl for further drying, for a day or two. All that’s left to do is package your ginger in an airtight container (I store mine in the freezer). It will keep almost indefinitely. And there’s nothing like slipping your hand into the freezer for what feels like a completely decadent treat.


Thanks for this recipe! i love crystallized ginger and you are right, it’s kind of expensive in the store. I could eat it “as is”, but usually add it to a cookie recipe a la Martha.
it’s really wonderful, and very difficult to screw up. a bit of a warning: there is a lot more heat in the homemade version.