Archive | diy RSS feed for this section

A Spring Wreath

16 Apr

Our door has been looking so woefully bare since the Christmas wreath came down – it’s so much nicer to come home to be greeted by a lovely piece of art instead of burgundy sameness day after day. (Okay, it’s not that bleak.)

I don’t like storebought wreaths and I loathe fake flowers, all plasticy and … fake. So I decided to try my hand at a spring wreath, again in paper:

flowers

Each petal is hand cut from white or cream cardstock, as are the fringed centers. Glitter and holographic embossing powder coat each petal, giving them a bit more depth and dimension. And each flower (after endless gluing) is finished off with a vintage button from my mother’s stash (and to think, just a short time ago I was going to get rid of the buttons altogether!).

wreath2

I won’t lie – this took me about a month and two false starts to get it right. But it’s so worth it, don’t you think?

finishedwreath

Egg-cellent Easter Eggs!

1 Apr

I am not even going to apologize for that pun – you had to know it was coming!

My super cool aunt submitted these pics of my uncle and cousins trying out the nail polish swirly egg trick.

DSCF0901

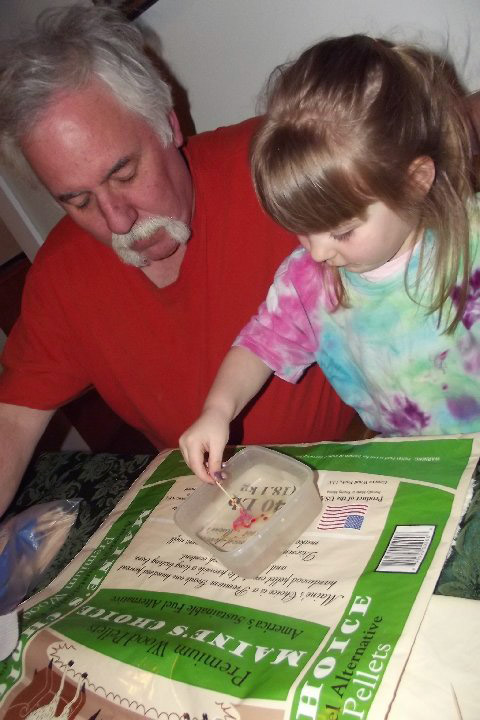
Payten and Grandpa getting their swirl on.

DSCF0909

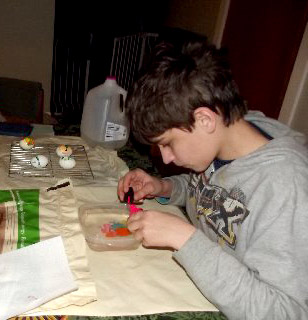
Christian – can you tell that he’s the precision type? This pic proves that even high school boys can down with some nail polish swirling!

DSCF0963

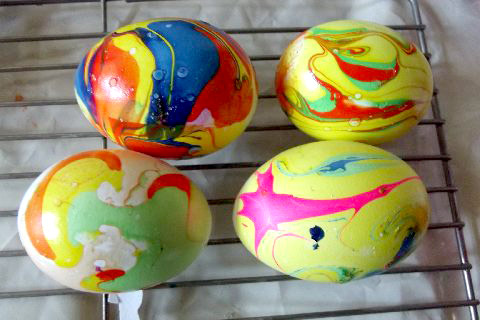
The end result – it really works!

So now tell me – did you dye eggs for the weekend, and if so, did you use this technique? (My mind is now buzzing with all the other things I can dye using this method – custom stationery, here I come!) How would you use this method on other media?

Today’s Project: Cardboard Cat Scratcher

25 Mar

Our dear little Windom Earle is finally starting to get obnoxious (or talented, if you ask her) with her clawing technique. Maybe “refined” is a better word. As in refined to the very expensive trunk we just bought for the living room. You wouldn’t think it to look at her, would you?

Windom Earle

But it’s true. So it’s time for a solution.

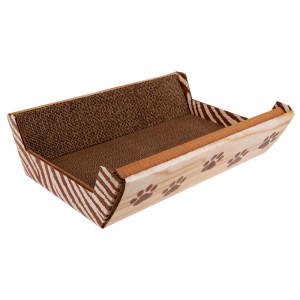
Enter the Scratcher Sleeper (TM me, I just made that up right here, right now.)

scratcherMy version is still under construction, but I hope to have it finished today and in action by tomorrow. Stay tuned for ridonkulously cute kitten pics!

Upcycled Trellis – From Golf Clubs!

24 Mar

I found these lovelies at a Goodwill a few months back and I couldn’t resist them. They are aqua, they are bakelite, they are awesome. Still, what do you do with just two golf clubs?

trellis1

Trellis!

trellis2

It’s going to be planted with my new jasmine plant which smells soooooo delicious – let’s just hope it doesn’t fry in the summer!

DIY Nail Polish-Dyed Easter Eggs

23 Mar

These are amazing. Amazing! They remind me so much of the swirly papers we used to make with paint and water when I was little, but ultra intense.

egs

All you’ll need is nail polish (I suggest hitting the Dollar Store for this), a dish of water and some nail polish remover for cleanup. You’ll also want a disposable plastic cup or bowl, toothpicks and of course, eggs.

Fill your container with water and then start adding drops of polish. Once you get a color combo that you like, use your toothpick to gently swirl the surface, creating the marbleized effect. Then you just dip! Go as far as you can on one end and let dry, then go back and repeat with the other side. Let them dry – topcoat or don’t, it’s totally up to you!

I would caution you to do this with blown out eggs or hard boiled eggs that you don’t intend to eat.

I think I’ll give it a try this weekend!

New Papercut

24 Aug

My mother-in-law’s birthday is coming up, and I am unable to be there for the big celebration, which just stinks. But at least I can send my husband over with a little gift.

This is papercut is kind of unusual in that it is brand new to me – I’ve never before used vellum, and this is my first go at a multi-layer cut. I only have the top layer done so far – but you can see what I hope to do with the rest of it.

And for those of you who might wonder: this is the Cape Hatteras lighthouse, in North Carolina.

I hope to have this completed by the end of the weekend, so keep an eye out!

Make This: Earl Grey Sorbet with Lemon Granita

20 Aug

Did I tell you guys I got an ice cream maker this summer? Well, I did. And it’s been in constant use since I brought it home. I’ve done mostly “safe” things so far: lemongrass-coconut, mango, orange sherbet, blueberry sorbet. Feeling that I’d conquered the basic techniques and skills I need to move on to flavor experiments, I turned to something I’ve been dreaming of for a long, long time – Earl Grey sorbet.

This could well be the simplest dessert you ever make.

Sorbet Recipe
4 cups Earl Grey tea, brewed at double strength (so, 8 tea bags for 4 cups water)
Zest of one lemon
4 thin lemon slices
Sugar to taste
2 cups whole milk, approximately

Here is your one instruction: Make a big pot of super strength tea, and then flavor according to taste. I brewed my tea with the zest, and floated the lemon slices on top for the cool down period. A quarter to half cup of sugar brought the mixture to the sweetness I prefer in a dessert, and then I added milk until the tea was as light as I would drink (being careful not to go past the capacity of my ice cream maker).

Remove the lemon slices once the mixture is cool enough to go into your ice cream maker (I usually chill overnight), and follow the instructions for your particular machine to create the sorbet.

Lemon Granita Recipe
Juice of 1 lemon
2 tsp sugar
Water, enough to bring the acidity down to a level you like

Mix it all together, pop it in the freezer, and after about 45 minutes, check on it. Use a fork to scrape the top and stir the slush around, then let it freeze the rest of the way. When you are ready to use it, scrape a fork across the top until you get those lovely little ice crumbles.

What is especially wonderful about the granita is that it melts faster than the sorbet, creating the most wonderful rivulets of lemon down the sides. Divine.

Doggie Duo – Of Medication

29 Jul

That old hide-the-pill-in-cream-cheese trick is so old school. Peanut butter is passé. Goopy, stinky wet dog food? Pfft.

What a recovering dog needs is something luxurious. Something tempting. Something Michelin-star worthy.

Like this:

Okay, maybe not Michelin. But let’s be frank: when is the next time your dog is going to waltz into Joel Robuchon’s latest establishment?

Draya (my little pit) is recovering from a tooth extraction and lipoma removal. She’s getting a little sick of plain old wet food and rice. So we decided to get creative with a few of her favorite things.

What we have here is a Medication Duo: Tramadol-banana and Amoxicillin-strawberry quenelles atop apple fans, with peanut butter-honey kisses and Beneful dust.

(My quenelles could use a bit of work – but in my defense, banana is hard to quenelle!)

New Paper Cut Card

27 Jul

I’ll just keep this short and sweet:

Here is a card that I made for my friend.

It took me 4 tries to figure out that I had to cut to the left of the fold (spatial reasoning fail).

As you can see, I’m still learning to cut the curves (lithium shakes don’t help).

It’s backed with watercolored and ironed tracing paper.

I hope she loves it.

New Weapon In the Paper Cutting Arsenal

23 Jul

I have several favorite tools that I use in my paper cuts – my two favorites are the swivel-headed X-Acto, and the retractable X-Acto. I know a lot of artists prefer to use a knife with a #11 blade, but I find those harder to control and harder to keep sharp (although you can sharpen them with a knife sharpener). I also have favorite pencils and papers, and so on.

But now I also have these:

Do you recognize them? Here’s a close-up:

I had never seen these before… until the day I stopped into Sally Beauty Supply for some hair goop. And there they were, beckoning to me from the manicure rack. They are sanding sticks, and they are a mere 39 cents each. And they are awesome because, however sharp or swivelly your blade is, your paper cuts will always have some jagged edges, especially in the curves.

The sticks are small, smaller than a pencil, and they fit perfectly into all kinds of swirls and curves. As long as you aren’t using tissue paper, they take the rough edges right off. (When you’ve been doing this with a tiny roll of uncooperative sandpaper for a while, you will see how miraculous these are. )

Did I mention how cheap they are? Love that.